How to Make a Sourdough Starter – Complete Beginner's Guide
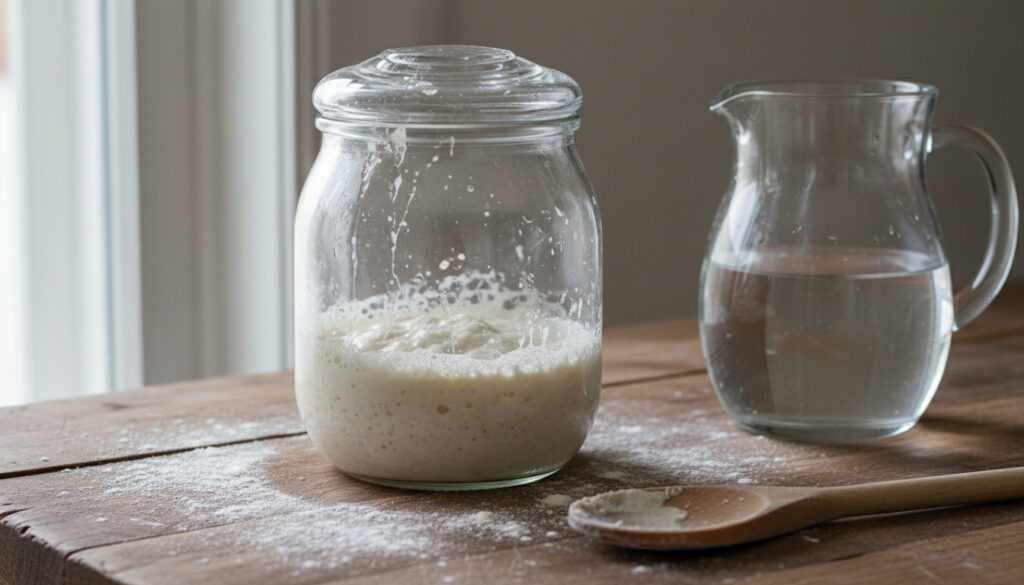
A sourdough starter represents one of baking’s oldest living traditions—a natural leaven created by fermenting flour and water to capture wild yeast and lactic acid bacteria from the environment. This culture enables bread to rise without commercial yeast through spontaneous fermentation, producing the tangy flavor and open crumb structure that distinguishes artisan sourdough from conventional loaves.
Creating a Sourdough Starter from scratch requires approximately seven days of cultivation before the culture develops sufficient strength to leaven bread. The process demands minimal ingredients but benefits significantly from precise technique, consistent temperatures, and an understanding of microbial fermentation.
Establishing a healthy culture requires selecting appropriate flour types and recognizing visual and olfactory cues that indicate readiness for baking.
What Ingredients and Tools Do You Need for Sourdough Starter?
| Time Investment 7 days active |
Skill Level Beginner |
Initial Cost Under $5 |
Final Yield Ongoing culture |
- Maintain ambient temperatures between 70-85°F for optimal fermentation speed.
- Use filtered or dechlorinated water to avoid inhibiting wild yeast colonization.
- Rye flour accelerates startup due to higher enzyme content and mineral availability.
- Digital scales provide necessary precision; volume measurements produce inconsistent results.
- Whole wheat flour provides superior nutrition for initial microbial establishment compared to white flour.
- Consistent feeding times reinforce predictable rising behavior.
| Component | Specification | Purpose |
|---|---|---|
| Day 1 Flour | Whole wheat or rye | High enzyme content boosts initial activity |
| Days 2-7 Flour | All-purpose or bread flour | Maintains structure, neutral flavor base |
| Water | Filtered, room temperature | Chlorinated tap water kills beneficial microbes |
| Feeding Ratio | 1:1:1 (starter:flour:water) | Maintains acidity balance and food supply |
| Container | Glass or plastic jar | Allows visual monitoring of bubble formation |
| Covering | Cloth or loose lid | Permits gas exchange while preventing contamination |
| Readiness Sign | Doubles in 4-8 hours | Indicates sufficient yeast population |
| Storage Temp | 70-85°F | Optimal range for Saccharomyces cerevisiae activity |
Step-by-Step: How to Make Sourdough Starter from Scratch
Days 1-2: Establishing the Base Culture
Day 1 begins with combining 100 grams of whole wheat or rye flour with 100 grams of room-temperature filtered water in a clear quart-sized jar. The mixture should resemble thick paste. Mark the level with a rubber band to track growth. Cover loosely with a kitchen towel and place in a warm location. Expect minimal visible activity during the first 24 hours as environmental microbes begin colonizing the flour.
On Day 2, discard approximately half of the mixture and feed with 100 grams all-purpose flour and 100 grams water. Some practitioners prefer to observe the full culture without discarding initially, though removing half prevents excessive acidity. The Beginner Sourdough Starter Recipe from experienced bakers emphasizes consistent 1:1 ratios after the initial whole wheat foundation.
Days 3-5: Developing Strength
By Day 3, reduce the starter to 75 grams and feed with 50 grams rye flour, 50 grams all-purpose flour, and 115 grams water. This combination maintains acidity while providing diverse nutrients. Bubbles may appear sporadically within 24 hours.
Days 4 and 5 follow similar patterns: discard half the starter (approximately 90g on Day 4, 105g on Day 5) and replenish with 60 grams all-purpose flour and 60 grams water each day. Observe for doubling in volume, which indicates active yeast production rather than bacterial gas.
Days 6-7: Maturation and Testing
On Day 6, continue the 60g flour and 60g water feeding schedule. The culture should display increased bubble formation throughout the mixture rather than just on top, accompanied by a tangy, yeasty aroma reminiscent of yogurt or beer.
Day 7 marks the readiness assessment. Reduce the starter to 20 grams and feed with 30 grams rye flour, 70 grams all-purpose flour, and 100 grams water in the morning. If the culture doubles within 4-8 hours and passes the float test (a teaspoon of starter floats in water), it is ready for baking.
Fermentation speed doubles with every 10°F increase within the safe range. Maintaining 80-85°F reduces doubling time to 2-6 hours versus 6-12 hours at standard room temperature. However, temperatures below 65°F essentially halt microbial activity.
How to Feed and Maintain Your Sourdough Starter
Daily Maintenance Protocol
Active bakers should feed established starters daily using a 1:1:1 ratio. Discard all but 50-100 grams of culture, then add equal weights of flour and water. For example, retain 50 grams starter, add 50 grams flour and 50 grams water. Consistent timing reinforces predictable rising patterns.
Refrigeration and Long-Term Storage
Once established, starters survive refrigerated storage for weeks. Feed the culture, allow it to sit at room temperature for 1-2 hours, then seal and refrigerate. Weekly maintenance requires removal, discarding half, feeding with fresh flour and water, and returning the brief room-temperature rest before cold storage again.
Before baking with refrigerated starter, revive it through 2-3 feedings at room temperature to restore full vigor.
Understanding Fermentation Biology
Wild yeast, primarily Saccharomyces cerevisiae, consumes available sugars and produces carbon dioxide gas that creates bread’s characteristic texture. Simultaneously, lactic acid bacteria generate organic acids responsible for sourdough’s distinctive tang. Whole grains accelerate this process through amylase enzymes that break complex starches into fermentable sugars.
Excess starter removed during feeding—called discard—contains active cultures suitable for cooking. Incorporate unfed discard into pancakes, waffles, or crackers before the mixture peaks to avoid excessive sourness.
Troubleshooting Common Issues
Off-Odors and Contamination
A vinegary or ammonia smell indicates over-fermentation or starvation. Pour off any accumulated gray liquid (hooch) and feed twice daily for 48 hours. While early vinegar notes fade naturally during maturation, persistent chemical odors suggest contamination requiring culture discard. Black mold or orange streaks necessitate immediate disposal.
Insufficient Activity
Lack of bubbles by Day 3-5 typically stems from cold temperatures below 70°F, chlorinated water, or airtight containers blocking wild yeast entry. Move the jar to a warmer location, verify water purity, and ensure loose covering. Rye flour additions often jumpstart sluggish cultures.
Failed Readiness Tests
Starters that fail to double or float by Day 7 usually require additional time rather than replacement. Continue consistent feedings at warmer temperatures for three additional days. Inaccurate scaling, inconsistent feeding intervals, or temperature fluctuations commonly delay maturation.
Never consume starter showing pink, orange, or black mold growth. These indicate pathogenic bacterial or fungal contamination that produces harmful mycotoxins. Healthy cultures display white or beige surfaces with pleasant acidic aromas.
How Long Does It Take and When Is It Ready?
- Day 1: Mix 100g whole wheat/rye flour with 100g water. Rest 24 hours. Expect no visible change. — Janie’s Mill
- Day 2: Discard half, add 100g all-purpose flour and 100g water. Culture remains mostly dormant. — Farmhouse on Boone
- Day 3: Reduce to 75g starter, feed 50g rye/50g all-purpose flour plus 115g water. First bubbles may appear. — The Perfect Loaf
- Day 4: Discard half, add 60g all-purpose flour and 60g water. Mark volume with rubber band to track doubling. — Video Demonstration
- Day 5: Discard half, feed 60g all-purpose flour and 60g water. Acidity increases, preparing yeast for stability. — Little Spoon Farm
- Day 6: Discard half, feed 60g all-purpose flour and 60g water. Yeasty aroma develops, distinct from bacterial sourness. — The Fresh Loaf
- Day 7: Discard to 20g, feed 30g rye/70g all-purpose flour with 100g water. Test for doubling within 4-8 hours and float capability. — Preppy Kitchen
What We Know for Certain and What Varies
| Scientifically Established | Variable Factors |
|---|---|
| Wild yeast and lactic acid bacteria drive fermentation | Exact microbial strains vary by geographic location |
| Seven days represents typical maturation timeline | Individual cultures may require 10-14 days in cold environments |
| 1:1:1 ratio maintains pH balance | Hydration preferences vary by baker (some use 1:2:2) |
| Whole grains contain enzymes that accelerate fermentation | Specific enzyme activity depends on grain source and storage conditions |
| Temperatures below 65°F halt yeast activity | Exact doubling times fluctuate with humidity and barometric pressure |
The Ancient Origins of Natural Leaven
Sourdough fermentation predates recorded history, with archaeological evidence placing its origins in ancient Egypt around 1500 BC. Before Louis Pasteur isolated commercial yeast strains in 1857, all leavened bread relied upon wild environmental microbes. This traditional method produced region-specific flavor profiles as local airborne bacteria and yeast colonized flour mixtures.
Unlike commercial yeast that provides rapid, predictable rise, natural leaven creates complex flavor compounds through extended fermentation. The symbiotic relationship between yeast and bacteria in a mature starter creates an acidic environment that naturally preserves the culture while developing the characteristic tang absent in quick-rise breads.
Expert Perspectives on Fermentation
“Whole wheat or rye flour on Day 1 provides nutrients—enzymes and minerals—to boost wild yeast and bacteria activity, while maintaining a 1:1:1 ratio after initial days ensures the starter remains active and healthy.”
— Little Spoon Farm
“Temperature impacts fermentation speed significantly. At 70-75°F, expect standard doubling in 6-12 hours, while 80-85°F accelerates the process to 2-6 hours due to increased yeast metabolism.”
— The Fresh Loaf
Beginning Your Sourdough Journey
Creating a functional sourdough starter requires seven days of consistent feeding, precise measurements, and temperature control between 70-85°F. Success depends on using whole wheat or rye flour initially, transitioning to all-purpose flour for maintenance, and recognizing the visual cues of readiness including doubling volume and bubble formation. Once established, the culture provides indefinite baking potential through proper Sourdough Starter maintenance practices.
Frequently Asked Questions
Can I use tap water for my sourdough starter?
Municipal tap water containing chlorine or chloramine inhibits wild yeast colonization. Use filtered, spring, or dechlorinated water. If only tap water is available, let it sit uncovered for 24 hours to allow chlorine evaporation before mixing.
Why does my starter produce liquid on top?
The gray liquid, called hooch, indicates starvation. Pour it off and feed the starter immediately. Hooch formation suggests feeding intervals are too long or ratios are insufficient for the ambient temperature.
Can I use metal utensils with sourdough starter?
Stainless steel tools are safe. Avoid reactive metals like aluminum, copper, or iron, which can react with acidic cultures and produce off-flavors or discoloration.
What recipes work with sourdough discard?
Unfed discard excels in pancakes, waffles, crackers, and quick breads. Use discard within 24 hours of removal or store refrigerated for one week. Do not use discard in recipes requiring active rise.
How do I travel with my starter?
Feed the starter, let it peak, then refrigerate for 24 hours before travel. Transport in a sealed container. For trips exceeding two weeks, dry small amounts of active starter on parchment paper as backup insurance.
More related posts
 Tableau des Médailles 2026 – Norway Leads Projections Canada Third
 Best Free Video Compressors – Top PC Mac Online Tools 2025
 Tim Hortons Coffee Menu: Options, Prices & Top Picks 2025
 Saas Bahu Aur Flamingo – Plot Cast Reviews Guide
 Best Oil for Deep Frying: Top Picks by Smoke Point & Health
 Cetaphil Gentle Skin Cleanser – Ingredients, Reviews, Usage Guide
 What Do Bed Bug Bites Look Like: Pictures & ID Guide
 Chicken Thighs in Air Fryer – Crispy Juicy in 20-25 Minutes